MetaMask is one of the most widely used non-custodial wallets in the crypto world, offering users the ability to manage assets, interact with dApps, and securely store private keys. However, not all tokens automatically appear in your MetaMask wallet, especially if they’re new, less common, or exist on a custom network like Binance Smart Chain or Polygon.
In this detailed guide, you’ll learn exactly how to manually add tokens to MetaMask, across multiple networks and platforms. We’ll also discuss why some tokens don’t show up by default, how to find the correct token contract address, and how to keep your wallet safe during the process.

What Is MetaMask?
MetaMask is a free, non-custodial crypto wallet available as a browser extension and mobile app. It allows users to:
- Store and manage Ethereum and ERC-20 tokens
- Interact with decentralized applications (dApps)
- Connect to various blockchain networks like Ethereum, BNB Smart Chain, Polygon, Avalanche, and more
- Swap tokens directly within the app
Official Website: https://metamask.io
Why Do Some Tokens Not Show Up in MetaMask?
MetaMask supports thousands of tokens, but many tokens don’t appear by default because:
- They’re new or recently launched
- They’re not popular enough to be auto-listed
- They’re on a custom network like BNB Chain or Arbitrum
- The wallet hasn’t interacted with the token yet
In these cases, you’ll need to add the token manually using its contract address.
How to Manually Add a Token to MetaMask (Ethereum Network)
Step 1: Open MetaMask
Launch the MetaMask extension or mobile app and unlock your wallet.
Step 2: Select the Correct Network
Make sure you’re on the Ethereum Mainnet. You can see or change the network from the dropdown at the top of the wallet.
Step 3: Click “Import Tokens”
Scroll down on the main wallet screen and click “Import tokens”.
Step 4: Enter the Token Details
You’ll be asked for:
- Token Contract Address
- Token Symbol (e.g., USDT, DAI, MATIC)
- Decimals of Precision (usually 18, but it depends on the token)
You can find this info on Etherscan:
- Visit https://etherscan.io
- Search for your token (e.g., “MATIC”)
- Copy the contract address from the token’s profile
Paste the info into MetaMask and click “Add Custom Token”, then “Import Tokens”.
How to Add a Token on Binance Smart Chain (BSC) or Polygon
If your token is not on Ethereum, follow these steps:
Step 1: Add the Network (if not already added)
To interact with Binance Smart Chain, Polygon, or other EVM-compatible chains, add the network to MetaMask:
- Go to Settings > Networks > Add Network
- Input the correct RPC details (you can find official settings from the network’s website)
Example: BSC Mainnet Settings:
- Network Name: Binance Smart Chain
- RPC URL: https://bsc-dataseed.binance.org/
- Chain ID: 56
- Symbol: BNB
- Block Explorer: https://bscscan.com
Step 2: Switch to the Custom Network
Select the new network from the dropdown.
Step 3: Import the Token
Repeat the “Import Token” process using the correct contract address from BscScan, Polygonscan, or similar explorers.
Where to Find the Right Token Contract Address
1. Official Token Website
Most reputable projects list the correct contract address on their website.
2. Token Explorers
Use blockchain explorers:
3. Reliable Exchanges
Crypto exchanges like MEXC often provide token info. Make sure to double-check against official sources.
4. CoinMarketCap or CoinGecko
These platforms often link directly to verified contract addresses. Be cautious of scam tokens with similar names.
How to Add Custom Tokens on Mobile (MetaMask App)
- Open the MetaMask app
- Tap “Import Tokens”
- Choose Custom Token
- Enter the contract address, symbol, and decimals
- Tap “Import”
Same rules apply: always verify the token details before importing.
What If the Token Still Doesn’t Show Up?
If the token doesn’t appear after importing:
- Confirm you’re on the correct network
- Re-check the contract address for typos
- Refresh MetaMask or restart your browser
- Check your asset list again — some tokens may not display until used
Advanced Tip: Add Tokens via Token Lists or WalletConnect
Some dApps like Uniswap, SushiSwap, and Aave offer “Add Token to MetaMask” buttons. Clicking this automatically fills the token info into your wallet.
You can also use WalletConnect to sync your MetaMask with trusted dApps and receive token suggestions based on your on-chain activity.
How to Stay Safe When Adding Tokens
Manually adding tokens can expose users to scams and fake tokens. Follow these safety practices:
- Never copy contract addresses from random social media posts
- Avoid clicking on token links in Discord or Telegram unless verified
- Use CoinGecko or Etherscan for safe lookup
- Confirm you’re on the right network before importing
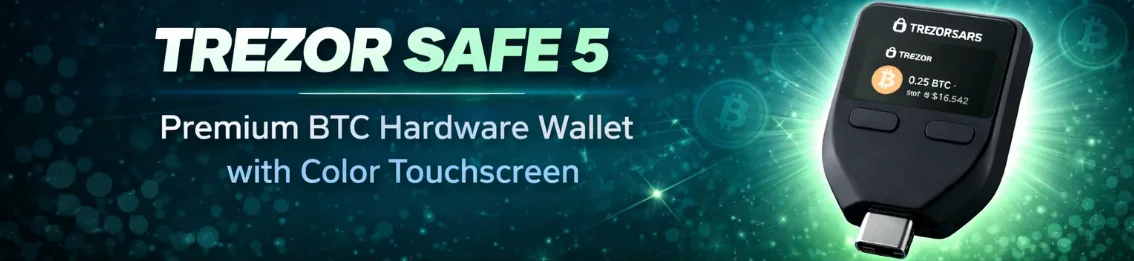
Pro Security Tip: Use a Hardware Wallet
If you’re dealing with large sums or valuable tokens, use a hardware wallet like Trezor:
These wallets integrate with MetaMask and store your private keys offline, adding a crucial layer of protection.
Frequently Asked Questions
Can I add tokens from any blockchain to MetaMask?
MetaMask supports EVM-compatible blockchains, such as Ethereum, BNB Smart Chain, Polygon, Avalanche, Arbitrum, and Optimism. Non-EVM chains like Solana or Bitcoin are not supported directly.
What happens if I enter the wrong contract address?
You might import a scam token or one that doesn’t reflect your real balance. Always triple-check the address.
Can MetaMask detect airdropped tokens?
Yes, but many airdropped tokens are spam or scams. Do not interact with unknown airdrops — they may contain malicious smart contracts.
Bonus: Using MEXC to Discover New Tokens
MEXC is one of the best exchanges to discover new and trending tokens. After purchasing, simply withdraw to your MetaMask wallet and import the token manually using the contract address.
MEXC often lists tokens before larger exchanges, making it a valuable tool for early adopters.
Final Thoughts
Manually adding tokens to MetaMask is an essential skill for any crypto user, especially as more projects launch on various networks. By following the steps in this guide, you’ll be able to confidently manage your assets and interact with dApps across multiple chains.
Just remember: Always verify token information, stay cautious of scams, and consider using a hardware wallet for added peace of mind.
Stay secure, stay informed, and happy crypto-ing!
Disclaimer
This article is for informational and educational purposes only and does not constitute financial or investment advice. Always do your own research (DYOR) and consult with a financial advisor if needed. Affiliate links may provide a commission to the author at no additional cost to you.